Search This Blog

Thursday 10 September 2015

22. LOVE Text effect in Photoshop

LOVE Text effect in Photoshop
1. Open a new page.
2. Write text "LOVE" from text tool.
3. Delete background layer.
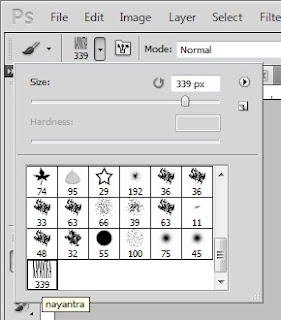
4. Go to Edit -> Define brush preset -> write brush name -> OK
5. Open second new page ang background color black.
6. Choose brush tool and select your  brush.
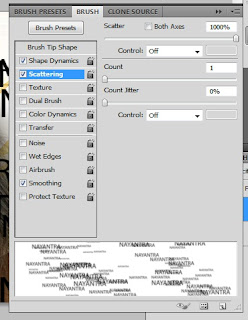
7. Go to Toggle the brush penel and set
   Shape dynams
      size-71
   Scattering-1000
   Dual brush
8. Creat a new layer and drag the brush.
9. again Creat a new layer and fill gradient.
10.set the belending mode "Subtrct" for the layer.

21. Goog morning Text effect in Photoshop

Goog morning Text effect in Photoshop
1. Open a new page.
2. Write text "Good morning from text tool.
3. Delete background layer.
4. Go to Edit -> Define brush preset -> write brush name gm -> OK
5. Open second new page ang background color black.
6. Choose brush tool and select your "gm" brush.
7. Go to Toggle the brush penel and set
   Shape dynams
      size-71
   Scattering-1000
8. Creat a new layer and drag the brush.
9. again Creat a new layer and fill gradient.
10.set the belending mode "Subtrct" for the layer.

Wednesday 9 September 2015

20. Text effect in Photoshop

Love Text effect in Photoshop
 1. Open a new page.
2. Write LOVE from text tool.
3. Delet background layer.
4. Go to Edit -> Define brush preset -> write brush name "LOVE" -> OK
5. Open second new page then input image.

6. Choose brush tool and select your maked LOVE brush.

7. Go to Toggle the brush penel and set
   Shape dynams
      size-71
   Scattering-1000

8. Creat a new layer and drag the brush.
9.Go to image layer -> right click on the mouse -> clipping mask.


19. Text effect in Photoshop

Text effect in Photoshop
1. Open a new page.
2. Write text from text tool.
 3. Delete background layer.
4. Go to Edit -> Define brush preset -> write brush name -> OK
 5. Open second new page then input image.
6. Choose brush tool and select your  brush.
 7. Go to Toggle the brush penel and set
   Shape dynams
      size-71
   Scattering-1000
 8. Creat a new layer and drag the brush.
9.Go to image layer -> right click on the mouse -> clipping mask.
10. Hue-198
    Saturation-29


Wednesday 26 August 2015

18. Fire effect on the tiger in photoshop

Fire effect on the tiger
1.       Open a Tiger  image in photoshop
2.       Select Tiger from quick selection tool.
3.       Copy , selected tiger and paste a new page. Background color black.
4.       Select tiger layer → Go to layer menu → Duplicate layer
5.       Go to image menu → Image rotation → 90ccw
6.       Select tiger layer → Filter menu → Stylize → Wind (select wind & from the right) → Ok
7.       Go to filter menu → Liquify → Select forward warp tool → Drag on the image
8.       Click adjustment layer → Hue/Saturation → (colorize on, Hue 40, saturation 100)
9.       Again click adjustment layer → Hue/Saturation → Only {Hue(-10)}
10.   Go to image layer → image rotation → 90cw

11.   Tiger copy layer on and erase down position.

Friday 21 August 2015

17. Dispersion Effect in photoshop

Make a Dispersion Effect in photoshop.

1.Open a image in photoshop.

2.Select girl body from quick selection tool.

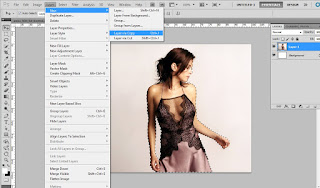
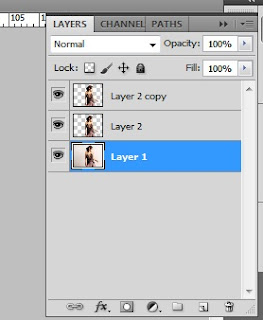
3.Go to layer menu -> choose new ->layer via copy.

4.Again go to layer menu -> choose new ->layer via copy.
5.Delet layer 1

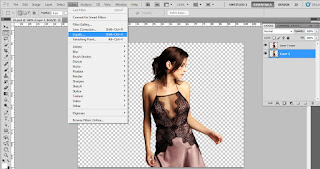
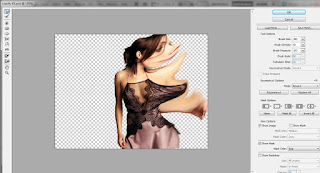
6.Select layer 2 -> Go to filter menu -> liquify -> select warp tool -> drag on the image as you like -> OK

7.Select layer 2 copy ->choose eraser tool -> select brush style as you like then erase half image.

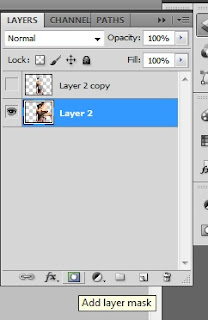
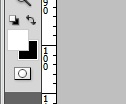
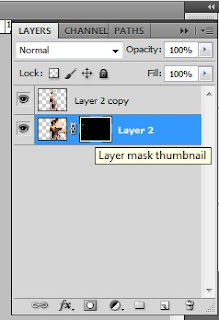
8.Select layer 2 add layer layer mask -> set color(forground color black & background color white) -> choose brush tool and drag on the image.

9.Again select layer mask thumbnail -> set color(forground color whit & background color black) -> choose brush tool and drag on the image.

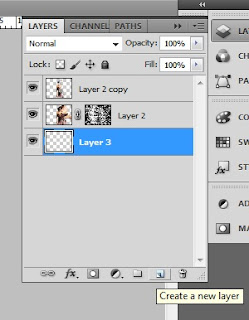
10.Creat a new layer & fill the color.

Tuesday 23 June 2015

16. How can painting easily any image in photoshop

Painting easily any image in photoshop

1.Open any image.
2.Select image layer and go to filter menu.
3.Choose brush strokes -> sumic-e  
4.Stroke width ->  10
   Stroke presser ->  08
   Contrast -> 0
   Press ok button


Monday 27 April 2015

15. background extrude make in photoshop

Background Extrude

1.Open a image with character.
2.Select background from quick selection tool.

 3. Go to layer menu -> select NEW -> Layer Via copy.
    you can see make a layer 2
 4. Select layer 2  -> Go to Filter menu -> stylize -> Extrude
           Type -> Blocks
           Size ->30 -> Random
  And press ok button